What Is an RO Faucet Guide, and Do You Actually Need One?
If you have a reverse osmosis (RO) system under your sink, or you’re planning to install one, you’ll need a dedicated RO faucet. This is a small, separate faucet that dispenses purified drinking water — distinct from your regular kitchen faucet, which still handles everyday tap water.
An RO faucet guide is a dedicated fixture, installed separately from the main kitchen faucet, that dispenses purified water from a reverse osmosis filtration system. It connects to the RO unit through thin tubing rather than your home’s main water supply line.
The reason this separation matters isn’t just convenience. Reverse osmosis strips out most dissolved minerals and impurities, which makes the resulting water more chemically “hungry” — more prone to picking up contaminants from whatever it touches on the way out. A cheap, low-grade faucet can undo some of the purification work the RO system just did. That’s why faucet material and certification matter more here than they do for an ordinary kitchen tap.
Who needs one?
Anyone with an under-sink RO faucet guide system, anyone upgrading from a builder-grade dispenser faucet, and anyone replacing a unit that’s started leaking, running slow, or making noise.
Why a Dedicated Faucet Matters?
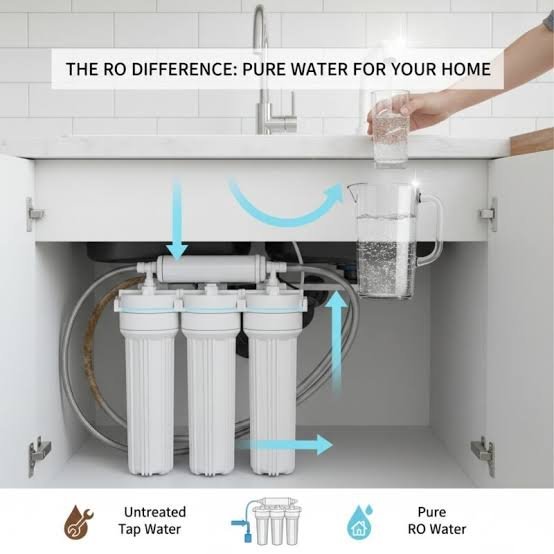
Running purified water through your everyday faucet isn’t really an option — RO faucet guide systems operate at a different pressure and flow rate than your main water line, and mixing the plumbing risks cross-contamination between filtered and unfiltered water.
A dedicated RO faucet solves three things at once:
- Separation — filtered and unfiltered water never share a spout
- Identification — you always know which tap gives you purified water
- Compliance — many plumbing codes require backflow protection specifically at this connection point
| Header label | RO Faucet | Standard Kitchen Faucet |
| Purpose | Purified water only | Everyday tap water |
| Flow rate | Lower, throttled by the membrane | Full flow |
| Connection | 1/4″ or 3/8″ tubing to the RO unit | Main water supply lines |
| Air gap option | Common, sometimes code-required | Not applicable |
Types of RO Faucet Guide
Not every RO faucet looks or functions the same way. Here’s what’s actually available:
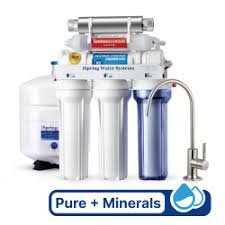
- Standard non-air-gap faucet — sleek, quiet, single-hole mount. The most common choice where local code allows it.
- Air gap faucet — includes a visible backflow-prevention gap in the drain line. Required in some jurisdictions.
- 3-way faucet — combines hot, cold, and filtered water in a single fixture, so you don’t need a second hole in your sink or countertop at all.
- Touchless/sensor faucet — activates with a wave of the hand, increasingly common in higher-end kitchens.
- Smart Ro faucet guide with digital display — shows filter life or TDS (total dissolved solids) readings directly on the spout.
For most households, the decision comes down to one question: does your local code require an air gap?
Air Gap vs. Non-Air-Gap:
What’s the Real Difference?
This is the single most common point of confusion, and it’s worth getting right before you buy.
An air gap faucet routes the RO faucet guide system’s waste water line through a visible physical break above the sink’s flood level. If your drain ever clogs, this gap stops waste water from siphoning back into your clean water line. Some municipalities require this by code, since it’s a straightforward, mechanical form of backflow prevention.
A non-air-gap Ro faucet guide relies on an internal check valve instead. It’s quieter (no gurgling during the drain cycle), has a cleaner look, and is simpler to install — which is why it’s the more common choice where code doesn’t mandate an air gap.
Bottom line if you’re not sure what your local code requires, it’s worth a quick call to a plumber or your municipal water authority before you buy. Regulations here vary significantly by country and even by city — what’s required in one place may be entirely optional elsewhere.
Materials That Actually Matter
Because RO faucet guide water is more reactive than tap water, the materials touching it matter more than they would on a standard faucet.
- 304 or 316 stainless steel — corrosion-resistant, inert, a strong choice for the parts in direct water contact.
- Lead-free brass — durable and widely used in the RO faucet guide body and waterway.
- Zinc alloy — common in budget faucets; less durable but keeps costs down.
- NSF-certified plastic (polypropylene) — used for some internal water passages; food-grade and chemically stable when properly certified.
- Ceramic disc valves — more leak-resistant and longer-lasting than rubber or plastic washers.
Look for NSF/ANSI 61 certification, which covers the safety of components that contact drinking water, and NSF/ANSI 372, which verifies lead-free content. These aren’t just marketing terms — they’re the actual standard bodies use to confirm a faucet won’t leach anything harmful into your water.
How an RO Faucet Fits Into the System?
Understanding the flow helps make installation and troubleshooting much less mysterious:
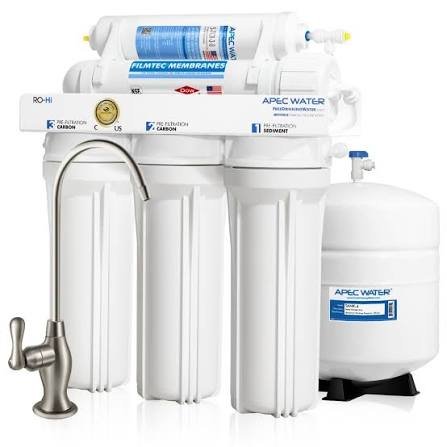
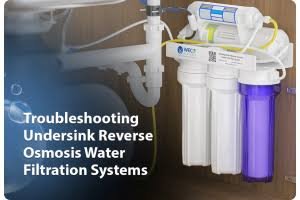
- Feed water passes through the RO faucet guide membrane and pre/post-filter stages under the sink.
- Purified water collects in a small pressurized storage tank.
- Opening the faucet handle releases that stored water through thin tubing up to the spout.
- Wastewater (the concentrate the membrane filters out) is routed to the drain — either through an air gap or a check valve, depending on faucet type.
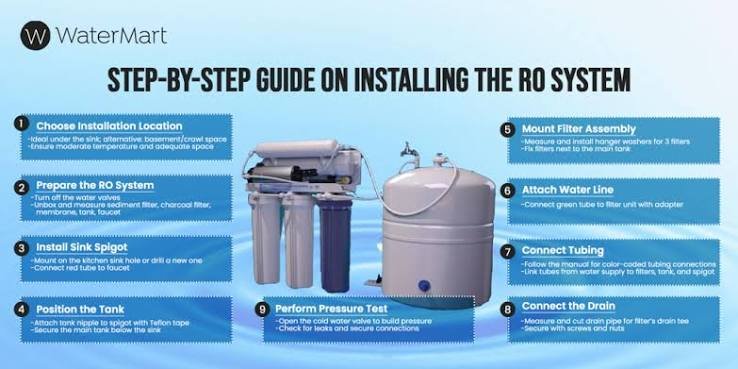
Installing an RO Faucet Step by Step
Most RO faucet guide are genuinely DIY-friendly, provided you have basic tools and a bit of patience.
- Pick your mounting point — an existing extra hole in the sink, a soap-dispenser hole, or a new hole drilled into the countertop.
- Insert the RO faucet guide shank through the hole from above, then secure it from below with the mounting nut and washer.
- Connect the tubing — typically 1/4″ push-to-connect tubing running from the faucet down to the RO unit’s output line.
- Route the drain line (air gap models only) — from the RO drain saddle, up through the air gap RO faucet guide body, and back down to the sink drain or garbage disposal.
- Flush the system by running the RO faucet giude for several minutes before regular use, to clear any carbon fines or trapped air from new filters.
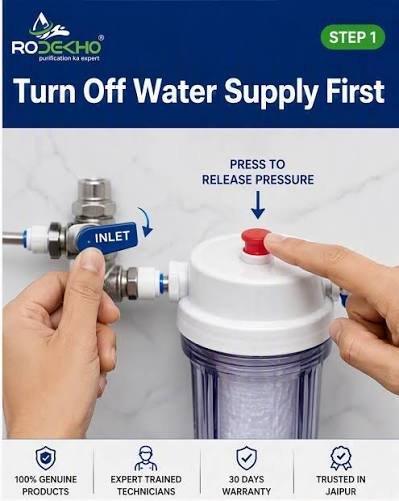
- Check every connection under normal water pressure for leaks before considering the job done.
Tools you’ll want an adjustable wrench, a tubing cutter, Teflon tape, and — if you’re drilling a new hole — a step bit sized to your countertop material.
Most DIY installs take 30 to 60 minutes if you already have an appropriate hole and clear access underneath the sink.
Compatibility:
Will It Actually Fit?
This is where a lot of buyers get tripped up, so it’s worth checking before you order:
- Tubing size most RO faucet guide use standard 1/4″ quick-connect tubing, compatible with the majority of residential RO systems. Some use 3/8″ — check your existing system’s fittings.
- Hole diameter typically between 1/2″ and 1-3/8″, depending on the faucet’s shank. A too-small existing hole may need to be enlarged a too-large hole may need a cover plate.
- Deck thickness the faucet’s mounting nut needs to accommodate your sink or countertop thickness. Granite and quartz countertops sometimes require an extended shank kit.
- Drain saddle compatibility air gap faucets need a matching air-gap-compatible drain connection on the RO unit itself.
If you’re replacing an existing faucet on a working RO faucet guide system, matching tubing size and thread type is usually enough to guarantee compatibility — you don’t need to replace the whole system.
What an RO Faucet Guide Costs?
Pricing varies by material, finish, and features:
| Tier | Price Range | What You Get |
| Budget | $15–$40 | Basic chrome or plastic-composite body, single function |
| Mid-range | $40–$90 | Solid brass or stainless steel, multiple finishes, air gap or non-air-gap options |
| Premium | $90–$200+ | Designer finishes, 3-way faucets, digital displays |
If you’re hiring a plumber rather than installing it yourself, expect to add somewhere in the range of $50–$300 in labor, depending on your region and whether any new drilling is required. These figures vary considerably by country — always treat them as a starting estimate rather than a fixed quote.
Common Mistakes to Avoid
- Installing a non-air-gap faucet where local code specifically requires an air gap
- Skipping the initial flush, which can leave your first several uses of water cloudy or gritty
- Over-tightening compression fittings, which can crack plastic components
- Ordering a RO faucet guide without checking your counter top’s deck thickness first
- Mismatching tubing sizes (1/4″ faucet on a 3/8″ system, or vice versa)
Troubleshooting:
When Something Goes Wrong?
Faucet leaking at the base:
Usually a loose mounting nut or a worn O-ring — both are simple, inexpensive fixes.
Water flow is slow:
Most often caused by a clogged pre-filter, a low-pressure storage tank, or a kinked tubing line. Check the tank pressure first — it’s the most common culprit.
Air gap faucet gurgling loudly:
This is often normal during the drain cycle, but persistent noise can mean a partially blocked drain line.
Faucet won’t turn off fully:
Typically a worn valve cartridge or ceramic disc — replacing the valve cartridge is usually cheaper than replacing the whole faucet.
Choosing the Right One: A Simple Decision Framework
If yes, buy air gap. If no, non-air-gap is quieter and has a cleaner look.
Want to match your existing kitchen fixtures?
Most manufacturers offer matching finish lines — chrome, brushed nickel, matte black, brushed gold.
Want extra functionality?
Consider a 3-way faucet (saves a hole) or a smart faucet with a TDS display.
Budget-conscious but want durability?
Mid-range solid brass or stainless steel RO faucet guide typically offer the best cost-to-lifespan ratio.
Alternatives Worth Considering
- 3-way kitchen faucet — integrates filtered and unfiltered water into your main RO faucet guide, avoiding a second hole entirely.
- Counter top RO faucet guide system — comes with its own built-in spout, skipping a dedicated faucet altogether.
- Refrigerator line tap — routes filtered water to your fridge’s dispenser, though it’s less convenient for general drinking and cooking use.
FAQ
What is an RO faucet used for?
It dispenses purified water from a reverse osmosis system, kept separate from your regular tap water supply.
Do I need an air gap faucet?
Only if your local plumbing code requires one. Where it’s optional, non-air-gap faucets are quieter and simpler to install.
Can I install an RO faucet Guide myself?
Yes — most installs are DIY-friendly with basic tools, and take about 30–60 minutes if the mounting hole already exists.
What size hole does an RO faucet need?
Typically 1/2″ to 1-3/8″, depending on the model. Always check manufacturer specs before drilling.
Why is my RO faucet’s water flow slow?
It’s usually a clogged filter, low tank pressure, or a kinked tubing line — check the storage tank pressure first.
Is an RO faucet universal?
Most use standard 1/4″ quick-connect tubing and are broadly compatible, but always confirm your existing system’s fitting type before buying.
How much does an RO faucet cost?
Generally $15–$200 for the faucet itself, plus $50–$300 in labor if you hire a plumber.
Can I use a regular faucet for RO water instead?
No — RO systems operate at different pressure and flow than your main line, and a dedicated faucet keeps filtered and unfiltered water properly separated.
Final Thoughts
An RO faucet is a small component with an outsized impact on how well your reverse osmosis system actually performs day to day. Getting the type, materials, and fit right — and knowing your local code before you buy — saves you from the most common headaches: leaks, code issues, and faucets that simply don’t match your setup.
If you’re starting from scratch, work through the decision framework above, confirm your air gap requirement locally, and choose a faucet with proper NSF certification. From there, installation is straightforward enough to handle yourself in under an hour.
These information about Projector Rental are gathered from different surveys, medical tests and tech giants like Techradar and more. Our top priority is to provide you valuable information.
For More Details About Different Water Filters Click Here